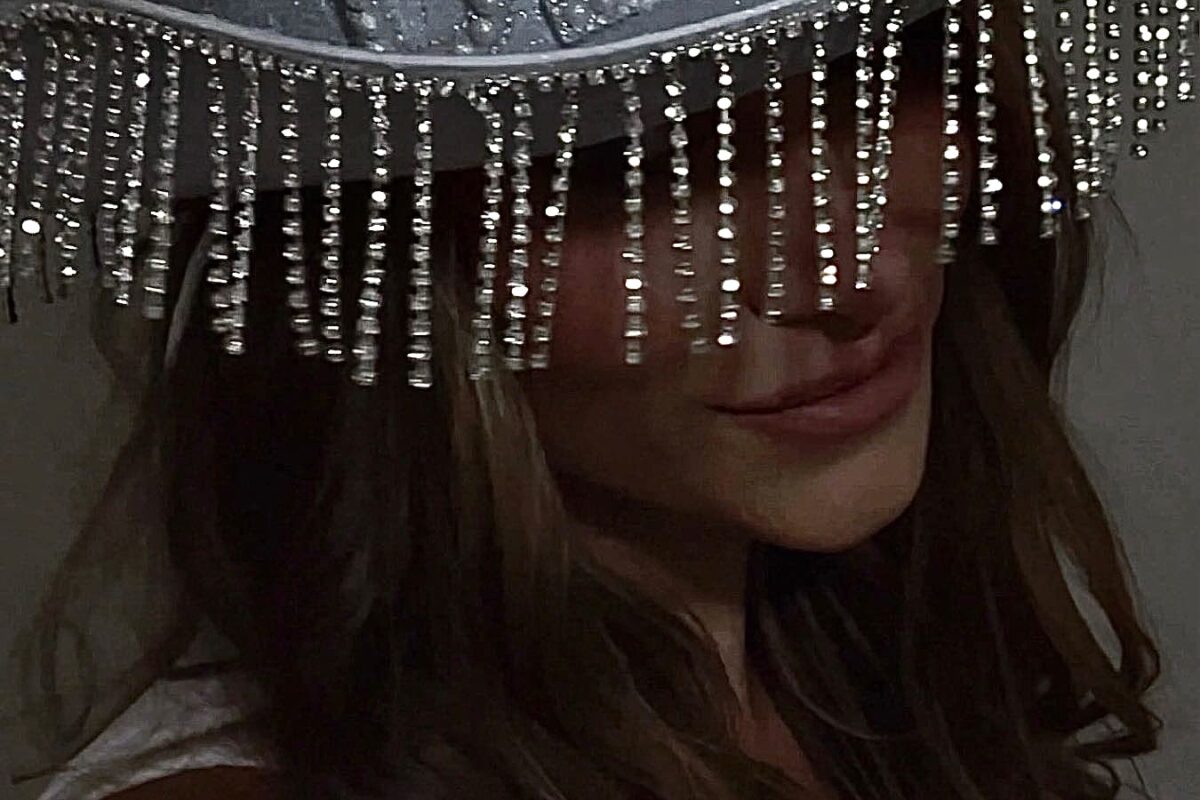
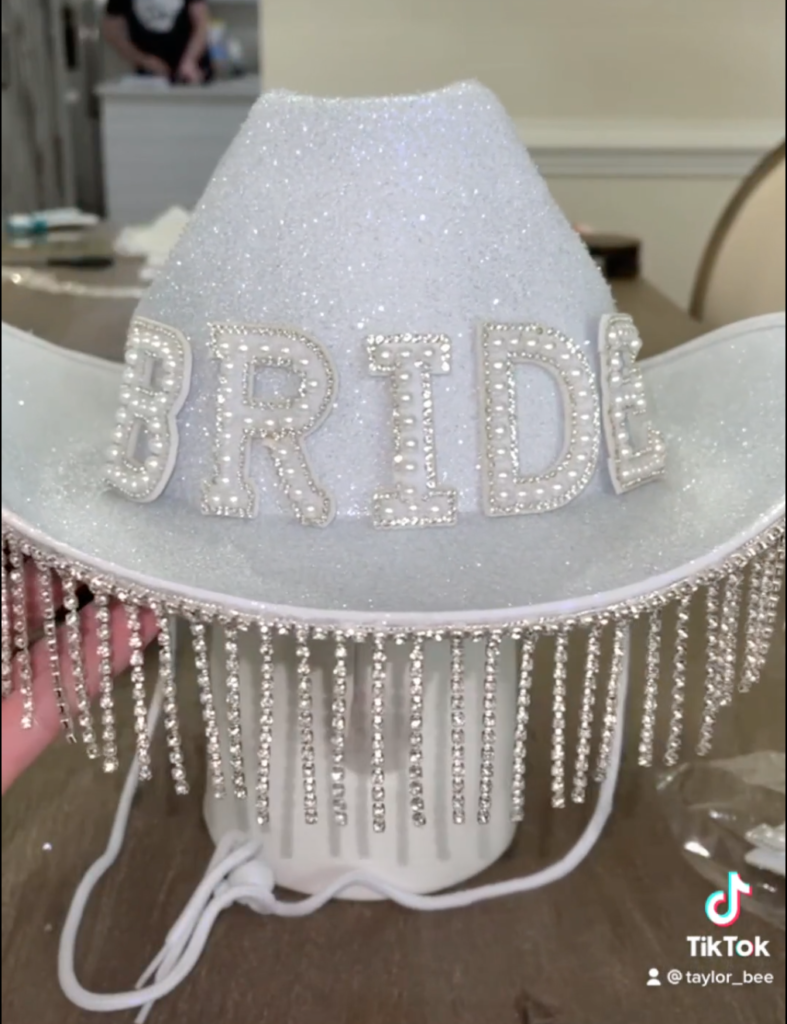
How to DIY your own rhinestone / glitter BRIDE cowgirl hat!
(NOTE: you can also customize this following the same instruction to say another word/initials/your name/etc!! or simply skip any words to have a more versatile variation of this style hat!)

Super fun to make for yourself or as a gift for someone else!
You can customize with so many embellishments/colors/themes! SO FUN! 🙂
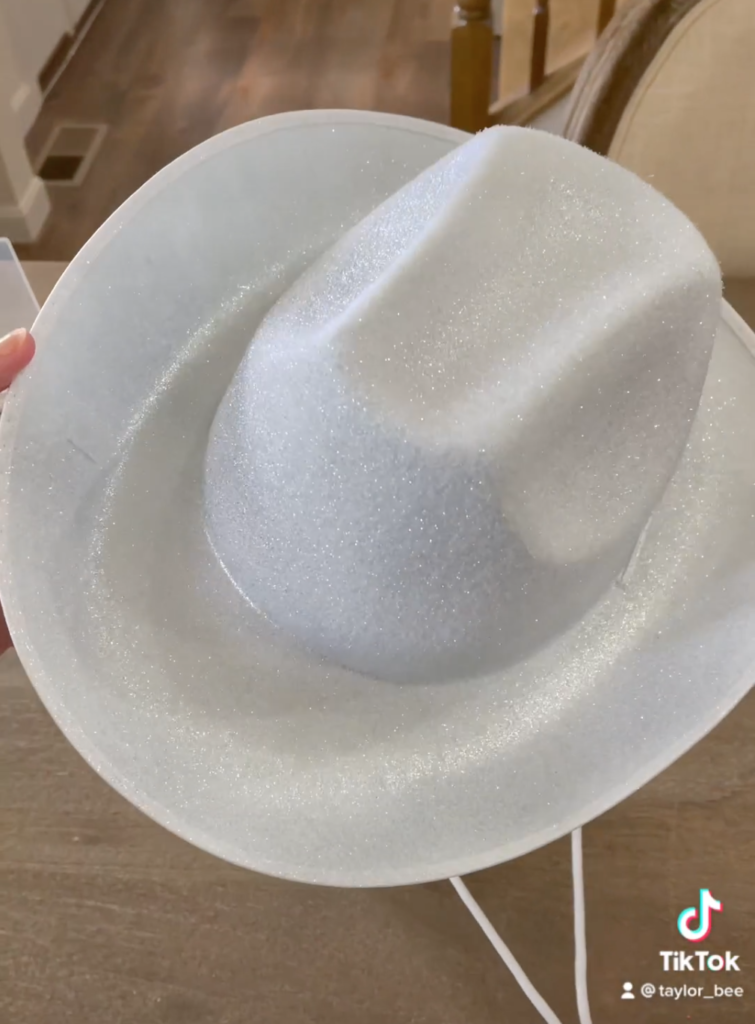
Everything you’ll need:
– hat: (comes in a 2 pack) https://rstyle.me/+se8-ZCY10tncJAXP1CHq9w
– rhinestone trim: https://rstyle.me/+Oc3BPAZEzUfAy61ZlX2X4g OR https://rstyle.me/+A2pJHSu9u89zLWM0PNRicQ
– spray glitter: https://rstyle.me/+WTkb0y_SE6cb5ewhsyWzKg
– clear top coat: https://rstyle.me/+9MNZTDTIT2ZoFYo5cLyPvg
– embellished letters: https://rstyle.me/+deP2nqqtnFeVBXLwK7l0sw
– glue: https://rstyle.me/+3WkzknEsmejgznP2DTklfQ

^ Click here to shop everything used to diy! ^
How To:
1. Spray glitter. You can build this up to be more opaque, or apply a light sheer layer. You can also use one, or more colors to create the look you’d like. (…do this outside, obvi)
^ Allow this to FULLY dry in between each layer!!!! Multiple light layers are best if you choose to build this up/add multiple colors.
2. Apply a clear sealant/top coat to ensure glitter is durable and has longevity.
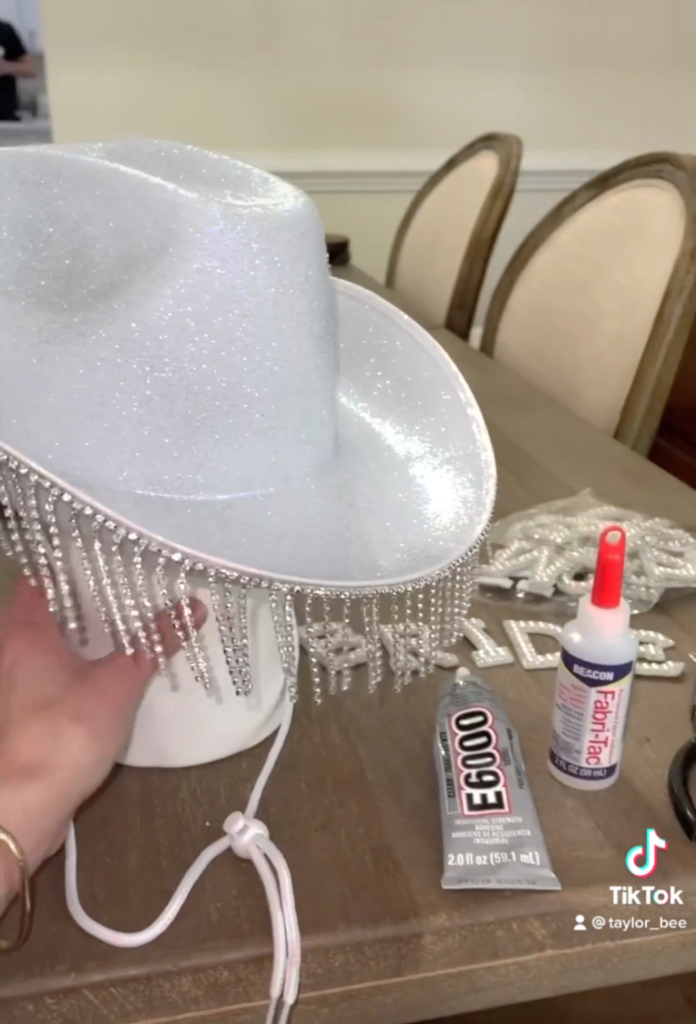
3. Using your e6000 or fabric glue, apply your lettering in front and/or back where you’d like…
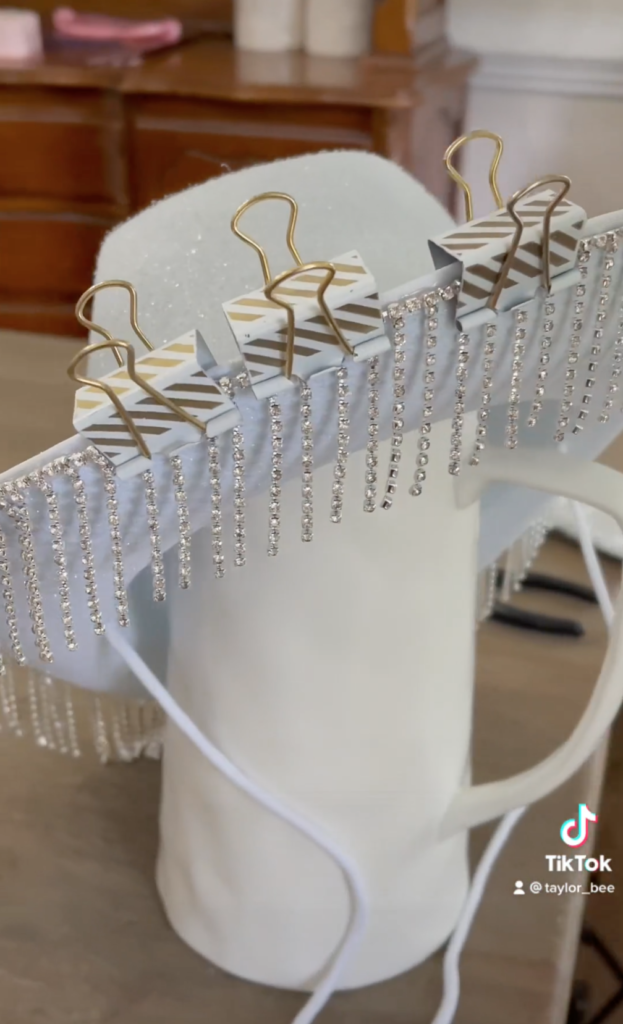
4. Using the same glue, use this in sections around the rim of the hat, (a strip of glue, then a strip of the rhinestones, repeat… ) You will need the time in between each to set your sections…I found using clips/clothes pins helped keep the rhinestone in place while drying.
*PLEASE ALSO USE THIS GLUE OUTDOORS/WELL VENTILATED AREA*
5. Let this all set for 24 hours …then you’re ready to ROCK IT 😉 !!
you also have the option of buying pre-made hats as a base to work with, …(or to wear as is if you’re not really the DIY type or maybe want something a bit more simple 😉